Tips for Clients Wanting to Use In-House Photographers
Periodically our clients ask about taking and using their own pictures for publication on their websites, advertisements, print products or for news releases. While using a trusted professional photographer is always the best idea, we recognize that budgets don’t always allow for that.
For those clients that have chosen to do-it-themselves, we’ve helped facilitate that decision by providing tips on how to increase the chances of getting the shots they need for their publication or release content.
What the Client Needs to Know
Perhaps the most important tips are for the client, not the photographer.
The first is this caveat: “Be prepared to adjust your expectations.” Our clients that manage and work frequently with volunteers usually understand this already. They know that “we get what we get” from volunteers, and that results can vary widely when they are utilized in all sort of contexts. Others have been suprised and disappointed when their volunteer brought back photos that were entirely unusable for their purposes.
Secondly, your in-house photographer needs to be both willing and able to take pictures for the purpose at hand. “Willing” means that the person should be comfortable with taking the pictures, and be OK with handling the assignment. “Able” means that he or she should have some photography experience and know how to operate the camera they’ll be using. There are few things more futile than plopping a company camera in the hands of an unprepared staff member and saying, “Here, take this camera. You’re going to be taking pictures at tonight’s fundraising event.”
What Your In-House Photographer Needs to Know
So, now that we have a happy, reasonably ambitious photographer to help out…
Thirteen Tips for Getting Decent, Good and (Sometimes) Great Pictures:
We’ve collected these tips from our own photographic experience and from professional photographers we’ve worked with over the years.
– Ansel Adams
None of them are hard and fast rules (some have been disregarded to spectacular effect!); instead, they’re guidelines to think about before and during shooting to help you get better pictures for your marketing and communications efforts.
- Be a Picture Director
- Get Close
- Move Around
- Use Plain Backgrounds
- Be Quick
- Compose with Care
- Be Selective
- Play with Time
- Look at the Light
- Watch the Weather
- Keep it Simple
- Be Bold
- and Lucky 13… We Can Always Photoshop it… Can’t We?
1. Be a Picture Director
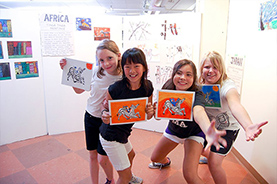
 A picture director picks the location: “Everybody go outside to the backyard.” A picture director adds props: “Girls, show off your artwork.” A picture director arranges people: “Now move in close, shoulder to shoulder… OK, closer still… and now lean slightly towards the camera.” A picture director controls the content of the image: “Thanks everyone, now if we could please put the cocktails down and out of the picture?” Most pictures won’t be that involved, but you get the idea: Your most useful pictures will be the ones you created by being in charge of their taking.
Never shoot people from behind and be sure that faces and eyes are facing your camera. There are situations where this rule might not hold, like shooting the back of a speaker if the audience out front is an important part of your subject matter, but these situations should make shooting someone from behind a choice, not an accident.
2. Get Close

 Each time you spot a subject, snap a shot and then move in closer for a better shot. Having your subject almost fill the frame helps your viewer understand and appreciate your photo. Details are often more interesting than the overall view.
If your subject is smaller than a car, take a step or two closer before taking the picture and zoom in on your subject. Your goal is to fill the picture area with the subject you are photographing.
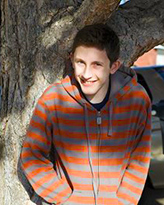
Look your subject in the eye. Direct eye contact can be as engaging in a picture as it is in real life. Hold the camera at the person’s eye level. For children, that means stooping down to their level. And your subject need not always stare at the camera. All by itself that eye level angle will create a personal and inviting feeling that pulls you into the picture.
3. Move Around
Check out all the angles. Move around your subject for the best possible shooting angle. You’ll want to be examining the lighting angles for harsh or unflattering shadows, bad backgrounds, and looking for the shot that will best highlight your subject and context.
4. Use Plain Backgrounds

 A plain background shows off the subject you are photographing. When you look through the camera viewfinder, study the area surrounding your subject. Pay special attention to the area around your subject’s face, head and shoulders. Make sure no poles grow from the head of your Student of the Month, and that no cars seem to dangle from your Executive Director’s ears. When shooting head shots or staff portraits, try to identify an appropriate background to shoot against. Empty walls have too little interest and may cast obvious shadows, but a disorganized bookshelf has too may distractions. Additionally, pulling your subject some distance from the background surface will soften shadows and blur the background slightly.
5. Be Quick
 If it is at all possible that your subject may move, bolt, fly away, stop smiling, or just get tired of waiting for you to take the picture, shoot once right away. Practice getting quicker and quicker to the draw. Do not worry about taking too many pictures and do not wait until you’re absolutely certain all the knobs and buttons are in their correct position.
6. Compose with Care
Everyone responds better to a picture that has all elements in balance. Strive to lead the eye along an interesting path through the photo, with the use of strong lines or patterns.
- Keep the horizon level.
- Crop out extra elements that you are not interested in (more on this in the next tip).
- Consciously place your subject where you think it most belongs rather than just accepting it wherever it happens to land in the photo.
- Play with perspective so that all lines show a pattern or lead the eye to your main subject.
- Work with the Rule of Thirds – Imagine a tick-tack-toe grid in your viewfinder. Place your important subject at one of the intersections of lines. If it’s a close-up portrait of a person, place them off-center towards one of the vertical third lines looking toward the center of the picture. That’s called creating “Look-room.”
Many digital cameras now have smart focusing to allow you to keep the focus on your object of interest regardless of its location in the viewfinder. If not, you’ll need to lock the focus where it needs to be.
7. Be Selective
 Discern what you are really interested in and center your efforts on getting the best photo of this subject, whether it’s a still life, a person, a place, or an event. Then be sure to keep anything that would distract out of the picture. The easiest way to do this is to watch your borders – the edges of the view you see through the camera’s viewfinder. It can be difficult to do this, but even in difficult cases, you have some options:
You can:
- Focus in on a close-up that tells the whole story.
- Move around.
- Take a panning shot.
8. Play with Time
 Use your shutter speed settings. Use a slow shutter speed and a tripod to capture still or very slow moving subjects. On the other hand, you can use a fast shutter speed (1/500 and up) to capture objects or people in motion.
Combining a fast shutter speed with a long lens, you could be able to catch the expression on your favorite athlete’s face as he gets the hit that drove in the winning run. Catching the moment in fast-paced action photography may take a little more practice, but it’s worth it, so hang in there.
9. Look at the Light
It’s generally best to shoot with the sun behind you. How is the light affecting your subject? Is the subject squinting? Is the light blazing directly and brightly upon your whole subject? This might work well if you want to highlight the bold colors of your subject. Side lighting, on the other hand, can add drama but can also cause extreme, hard contrasts. Lastly, indirect light can be used to make your subject glow more softly. If your camera allows you to bounce the flash off of a nearby surface, by all means, do that!.
10. Watch the Weather
Look outside and decide whether or not you are going to want to have the sky in your picture. If it’s overcast, simply keep the sky out of your pictures as much as possible. This is usually the best way to avoid both muted tones in your subject and washed-out skies in your background. When the day is beautiful, go ahead and make the most of it. If your camera allows for the use of filters, purchase a polarizer. This will help you render deep blue skies against bright white clouds, richly contrasting colors, and other wonderful effects with a simple twist of the wrist.

 When taking people pictures on sunny days, turn your flash on. You may have a choice of fill-flash mode or full-flash mode. If the person is within five feet, use the fill-flash mode; beyond five feet, the full-power mode may be required. With a digital camera, use the picture display panel to review the results.
On cloudy days, use the camera’s fill-flash mode if it has one. The flash will brighten up people’s faces and make them stand out. Also take a picture without the flash, because the soft light of overcast days sometimes gives quite pleasing results by itself. If the picture is to be printed in black and white, the softer light of an overcast day will likely be more pleasing than color.
11. Keep it Simple
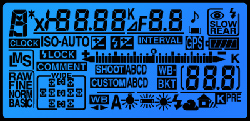
 While you may wish to have “all the bells and whistles” available just in case, you will probably get the best results if you do not try to use them all the time and instead learn a simple set up that works best for the situations you will encounter on your shoot. Instead of relying on a fully automatic program, pick a simple, semi-automatic program such as aperture-priority and learn a little about shooting in that mode. Then, you’ll be able to control certain basics without having to fiddle with your camera too much, and keep that 150-page manual where it belongs – in your camera bag.
12. Be Bold and Keep Shooting
Don’t allow yourself to be paralyzed by fears of using the wrong settings. Shoot lots of pictures. We learn from every image we shoot. The ultimate goal is of course to get a few we can USE. So how many should you take to help ensure a good shot? That varies of course with skill and experience. But for individual or group portraits we usually recommend, when it’s possible, taking 5-10 shots to ensure one publishable image. For general events and action, it’s more; we usually hope to find 1 good picture in every 20 shots.
Don’t be hesitant, and don’t worry about being intrusive when shooting. If you are concerned about upsetting someone by taking their picture, just ask if it’s okay. They will always let you know if it’s not, and if it is okay, they will often be more cooperative subjects.
13. We Can Always Photoshop it… Can’t We?
Yes, you can! But digital post-editing is WAY more expensive than capturing the image you need IN camera. And let’s remember, the reason you’re doing it yourself in the first place is to save money!


